There’s something satisfying about leaving a permanent mark on wood, no? Whether it’s a logo, initials, or a special symbol, branding wood gives it a personal and lasting identity. However, before that iron touches the surface, there are a few things worth knowing, not just for safety, but also to get that clean, smooth look without stress.
If working with heat sounds a little intimidating, that’s okay. It’s normal to feel cautious. A branding iron for wood does get extremely hot, so the key is learning to handle it the right way from the start. So, let’s go through everything step by step.
Get Set Before You Heat Up the Branding Iron for Wood
It might be tempting to jump in and try it out right away. Still, the first thing that should happen isn’t heating up the iron. It’s about checking your setup. So, before doing anything:
- Make sure the surface around you is dry, flat, and not surrounded by paper, sawdust, or anything that could catch fire.
- If you’re using an electric iron, check the cord. Look for wear or exposed wires.
- For gas-powered irons, check all connections. Nothing should be loose or leaking.
- Keep a fireproof mat or tile nearby where you can safely set the iron down.
The Temperature Doesn’t Forgive
Getting the iron hot is easy. Knowing when it’s ready is where most people go wrong. A branding iron for wood that’s too hot will leave deep burns and smoky edges. Too cool, and the mark ends up patchy.
So, it’s better to heat the iron fully, then test it on a small piece of wood that’s the same type as your final piece. That way, you’ll see exactly how long to press and how much heat is just enough. Also, stay aware of the handle. It may feel fine at first, but over time it can get warm. However, gloves with a good grip are always a smart call.
Practice Before the Real Thing
Even if the iron is perfect, things can still go sideways if you’re nervous or unsure how to press it. That’s why testing it out first matters more than people think. Take a few pieces of leftover wood and try branding them. Watch how the mark looks with short presses, long presses, firmer pressure, or a gentler hand. Most people notice their best results when they:
- Hold the iron still, without moving or tilting it
- Apply even, steady pressure for 2 to 5 seconds
- Avoid lifting or checking halfway through
See also: Opera Browser Testing: Automating Cross-Browser Tests With Selenium
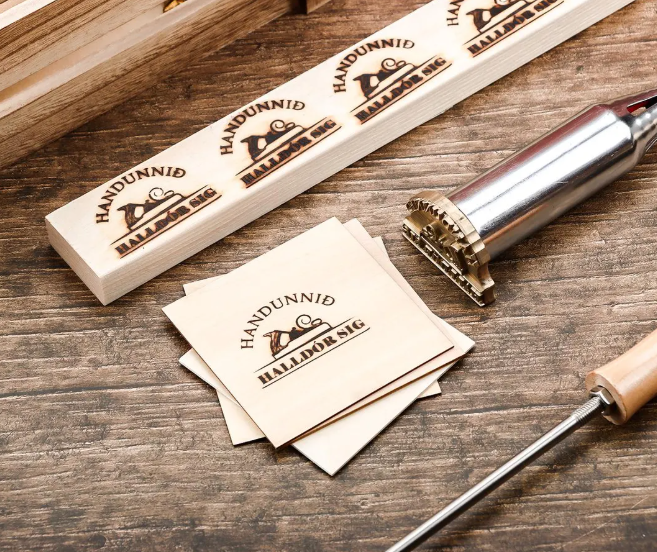
Pick the Right Branding Iron for the Job
There’s no single branding iron for wood that works best for everyone. It depends on how often you plan to use it and the kind of marks you want to leave. Some folks go for simple initials, while others need full logos with text and dates.
This is where Short Order Products come in. They’ve been making custom branding irons for years, designed for woodworkers, small business owners, and anyone who wants consistent results without the headache. The great part? They don’t offer generic solutions. You can work with them to create a setup that’s suited to how you work, with no extra features you don’t need.
4 Things to Avoid When Using Branding Iron
Branding irons look simple, but there are mistakes that can throw things off. Some might just leave uneven marks. Others can be dangerous. So before the iron touches the wood, keep these things in mind:
- Don’t rush. Heating up takes time, and so does cooling down.
- Never brand over wet or oily wood. It affects both the temperature and the finish.
- Never leave the iron plugged in and unattended.
- Don’t use it near kids or pets, even if it seems secure.
Maintenance Keeps You Ahead
Once branding is done for the day, the job isn’t quite over. A branding iron for wood that’s left dirty or stored while still hot can lose its shape or break down faster.
Therefore, let the iron cool naturally. Then, use a fabric or brush to clean off any wood residue. For electric irons, check the wiring every few uses. For gas models, tighten the parts and clean off dust or grime. Stored correctly and cleaned regularly, a good branding iron can last for years without problems.
Final Words!
Working with a branding iron for wood isn’t complicated, but it does call for attention and patience. The better the setup, the smoother the results will be. That’s why so many turn to Short Order Products. Their electric and gas branding irons, logo engravings, and custom-built tools are made for woodworkers who value clean, lasting impressions. So, if you’ve been thinking about branding your own wood projects, now’s the time to start with the right equipment. Visit their website today!